Do you ever get to Friday and wonder where the week went?
I hear ya. Some weeks just seem to happen TO us. Appointments pop up, the to-do list keeps growing, and the things that really matter get pushed to “next week” (again).
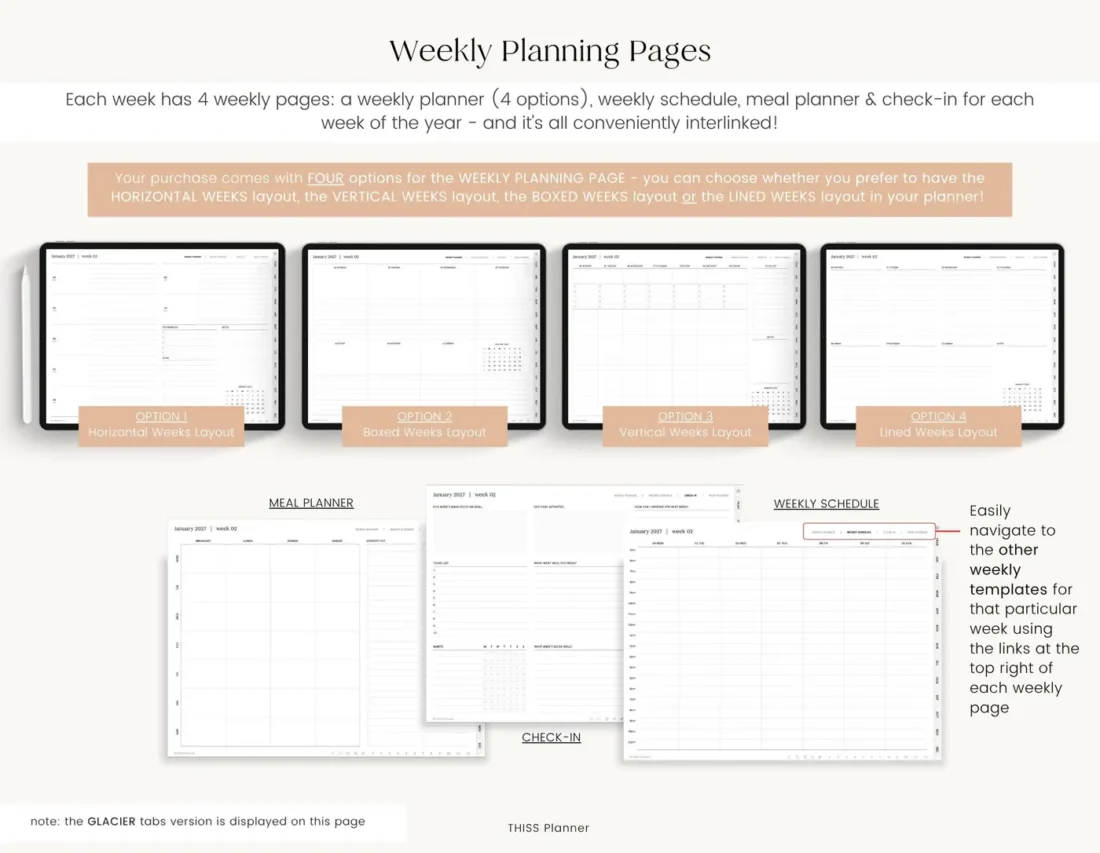
Taking a little time to plan your week before it starts can make a big difference. In this post I’ll share a simple weekly planning routine you can follow in your digital planner, step by step, including how to time block your days on the weekly schedule.
I’ll show you the pages I use in my own planner, but don’t worry if yours looks different. The steps work in any planner with weekly pages, or even a blank notes page.
In short
- Pick one time each week to plan, ideally just before your week starts.
- Look back before you look ahead. Finish last week’s check-in first.
- Empty your head onto a brain dump, check the month for fixed dates, then choose a few top priorities.
- Time block your priorities into the weekly schedule, plan meals and habits, then move each day’s plans onto your daily pages.
Choose your weekly planning time
Start by picking ONE time each week that’s your planning time, and treat it like an appointment with yourself.
It’s easiest just before your week begins, so Sunday or Monday, depending on when your week really starts.
And it doesn’t have to be early in the morning! I’m a night owl (I work late into the night), so I’d never tell you that planning only counts if it happens at 6am. Choose a time you’ll actually stick to.
Make it easy to start, too. If your planner is on your Home Screen, it’s one tap away. Here’s how to set that up.
Step 1: Look back at last week
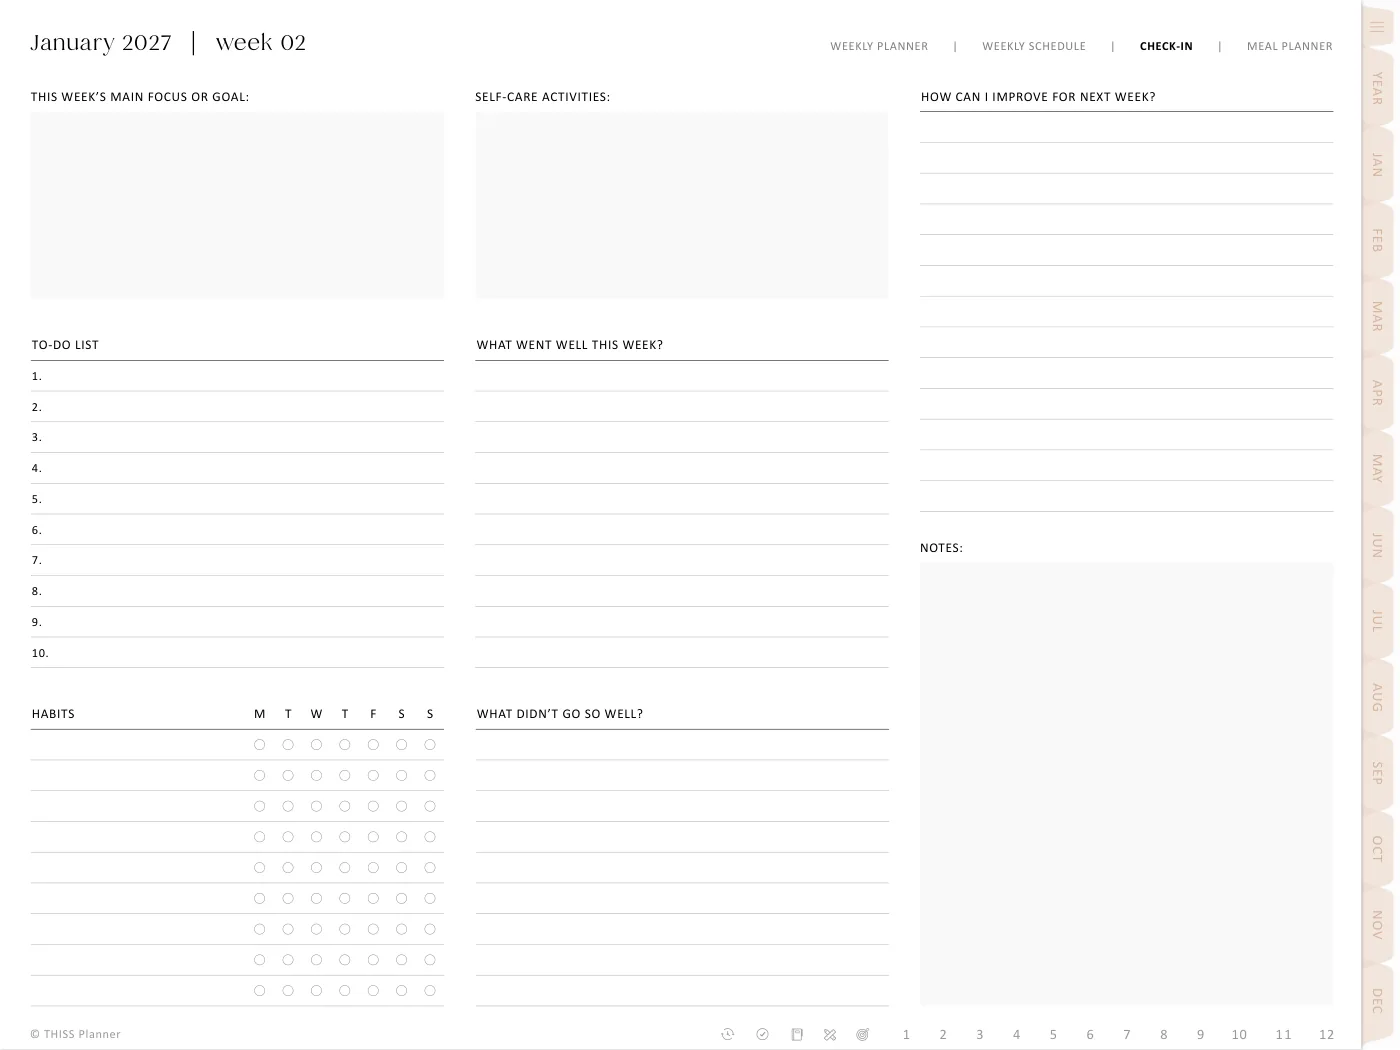
Before you plan ahead, take a quick look back. I use a weekly check-in page for this, but a few lines in your notes work just as well. Ask yourself:
- What went well this week?
- What didn’t go so well?
- How can I improve for next week?
This only takes a few minutes, and it stops you from planning the same overloaded week over and over. Did you squeeze in too much? Was there one task you kept putting off? Write it down, and keep it in mind when you plan the next week.
Then carry over anything unfinished from last week’s to-do list.
Step 2: Empty your head with a brain dump
Next, get everything out of your head and onto the page. Open the brain dump page (or the master to-do list) and write down every task, errand, idea and worry you can think of.
Don’t sort anything yet. Just write!
It’s amazing how much lighter you feel once it’s all on paper. Well, digital paper.
Step 3: Check your month for fixed dates
Now open this month’s monthly planner and look for anything already booked for the week ahead, like appointments, birthdays, school events, due dates and pay days. Copy them onto your weekly planner, next to the right day.
If your planner is hyperlinked, tap the tabs and dates instead of scrolling. Jumping between your month and your week becomes SO much quicker.
Step 4: Choose this week’s top priorities
This is the most important step, so please don’t skip it!
Look over your brain dump and ask yourself which few things would make this a good week. Write them in the top priorities on your weekly planner. Keep it to a handful. If everything is a priority, nothing is.
On the weekly check-in page, write one main focus or goal for the week too. If you’re working towards a bigger goal, this is where you break it into this week’s small step. (My post on how to set goals you will actually achieve goes into this.)
Everything else from your brain dump goes on the weekly to-do list, or back onto the master to-do list if it can wait. The priority matrix page is handy here if you’re not sure what can wait.
Step 5: Time block your weekly schedule
This is where your week really comes together.
Time blocking simply means giving each task a time slot, instead of just a spot on a list. All you need is a page with an hourly timeline for each day of the week (mine runs from 5am to 11pm). Here’s how to fill it in:
- Block your fixed commitments first. Work, school runs, classes and appointments. These are the things that won’t move.
- Add your top priorities next. Give each one a real block of time, on the day you’re most likely to get it done.
- Batch the small stuff. Group emails, errands and phone calls into one block, instead of scattering them all through the day.
- Leave some white space. Things always take longer than we think, so don’t fill every hour.
- Color-code your blocks. Use a different highlighter color for work, family and personal time, so you can see the balance of your week at a glance.
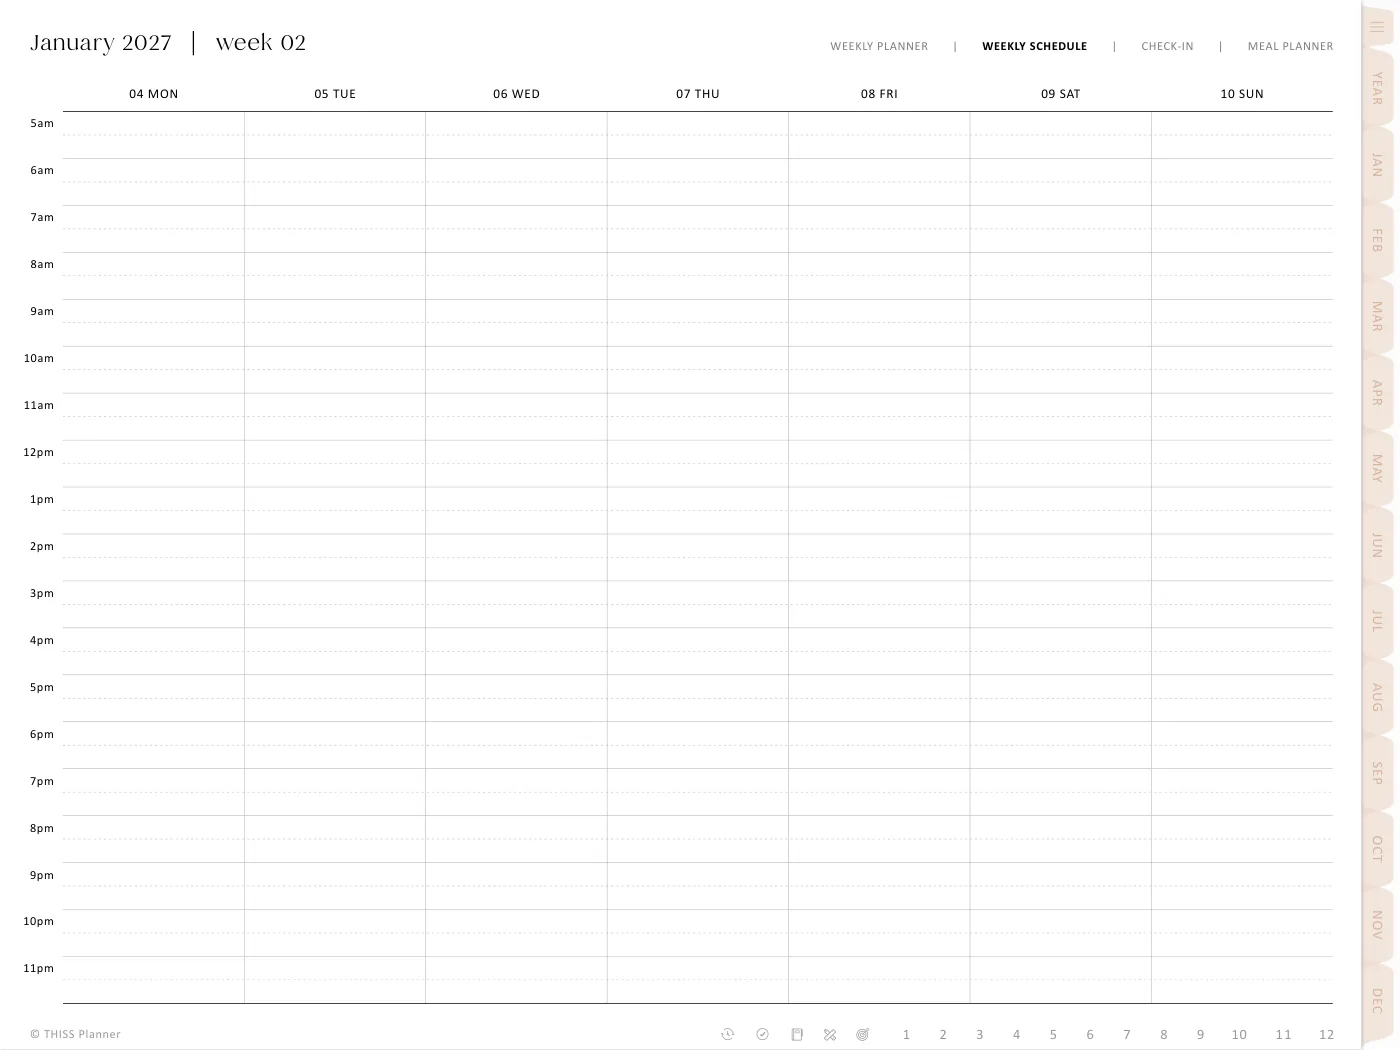
Plans change, and that’s OK. In Goodnotes, use the Lasso tool to select a block you’ve written and move it to a new time. As someone whose paper planners used to be full of eraser marks and white-out, I still love this!
Step 6: Plan your meals and habits
Two more quick pages and you’re done.
- Meal planner: fill in this week’s meal planner (a meal ideas list makes this super quick), then write what you need on the grocery list.
- Habits: the weekly check-in has a habits section with a circle for each day. Write the habits you’re working on this week, then tick them off as you go.
- Self-care: while you’re on the check-in, jot down a self-care activity or two. It’s so easy to forget about yourself when the week gets busy.
Step 7: Turn your week into daily plans
Your weekly plan is the big picture. Each day, open that day’s daily planner (tap the date on the monthly page) and bring across what you need.
A good daily page has a schedule, a few top priorities, a to-do list and some space for notes. Copy over your time blocks from the weekly schedule, pick that day’s top priorities and you’re set.
Not every day needs its own daily page, by the way. On quieter days, the weekly page is plenty.
Common questions
How long should weekly planning take?
Once you get the hang of it, about 15 minutes is often enough. Your first week will take longer while you fill in your master to-do list and meal ideas, and that’s fine.
What if my week doesn’t go to plan?
It won’t always, and that’s completely normal! Move what you can, carry the rest over to next week, and write what got in the way on your check-in. That’s useful information for next week’s plan.
Can I follow these steps in an undated planner?
Yes! The steps are exactly the same. You just write in the dates yourself, which also means you can skip a week without wasting any pages.
Make this week the first one
You don’t need a perfect system to start. Pick your planning time, open your weekly pages and work through the steps once. Then tweak it as you go, because a weekly routine is always a work in progress.
Happy planning! And if you’d like a few weekly pages to practice on, there are free planner samples in the free library.
Keep reading: How to stick with your digital planner all year, How to keep all your plans in one digital planner and How Atomic Habits helps me plan every day.